Payment Selection |
|

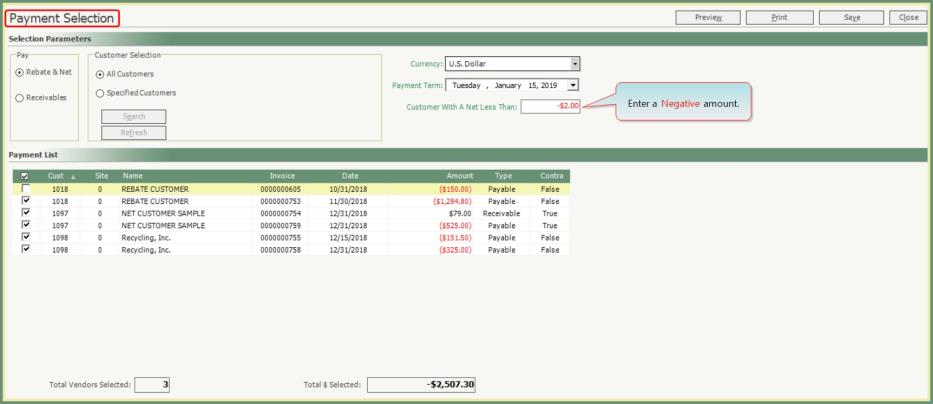
Payment Selection is used to make Rebate payments to customers identified as account type Pay Rebates or Net in Customer Explorer. This process will scan through your account payables and receivables and create a list of those customers to whom payment is due. New Invoices For Payment can be selected from this payment list to be processed for payment. Once Invoices Selected For Payment is created, the payment selections can be Modified or Deleted prior to printing checks.
Navigate To: Accounting>Rebates>Payment Selection
Create New Invoices For Payment
Note: Payment Selection will Not include customers for whom their Receivable amount Exceeds their Payable amount.
- Select Pay type Rebates & Net or Receivables.
- Rebates & Net: Customer Explorer Account Types Pay Rebates or Net.
- Receivables: Customer Explorer Account Types Receivables.
- Make Customer Selection of All Customers or Specified Customer.
- Select the correct Currency from the Currency drop down.
- Select the Payment Term Date.
- The Date of the Customer Invoices is compared to the Payment Terms Date to see if the Payment Terms value on the customer account has been reached.
- Example: Invoice Date=12/01/2018. Payment Terms=10. The Invoice will come up for payment selection on or after Payment Terms Date of 12/11/2018.
- Enter a Customer With a Net Less Than amount or leave as $0.00 to pay all amounts.
- Specify the Minimum payment amount to be processed. This value is used to prevent payments/checks from being processed for insignificant amounts, such as less than $1.00.
- This should be entered as a Negative amount. For example, -$1.00.
- Select the Invoices in the Payment List to send for payment.
- Based on the parameters selected above, the Payment List will populate with all items that match your criteria and the Contra Allowed settings on the customer accounts.
- Select the invoices you want to include in the payment process (including any Accounts Receivable contra items) by checking the appropriate box on the left side of the list.
- The Total Vendors Selected and the Total $ Selected fields are updated each time a selection is made to show the total value of your selections.
- To cancel the selections without saving, click Close.
- Click Save to save the selected Invoices For Payment.
- The Payment List will be retained in the Payment Selections File and can be changed and re-saved at a later time until the Payments have been processed.
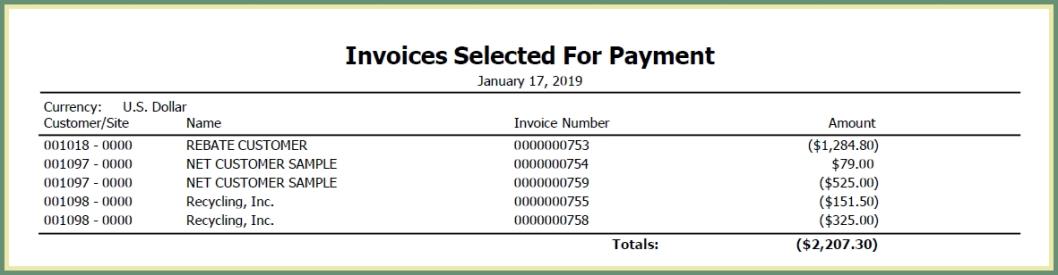
- Select Preview or Print to generate the Invoices Selected For Payment report.
- Saves the Payment List selections to the Payment Selections File and can be changed and re-saved at a later time until the Payments have been processed.
Modify Existing Selection of Invoices For Payment
An existing selection of invoices has already been saved when the selection parameters are disabled.
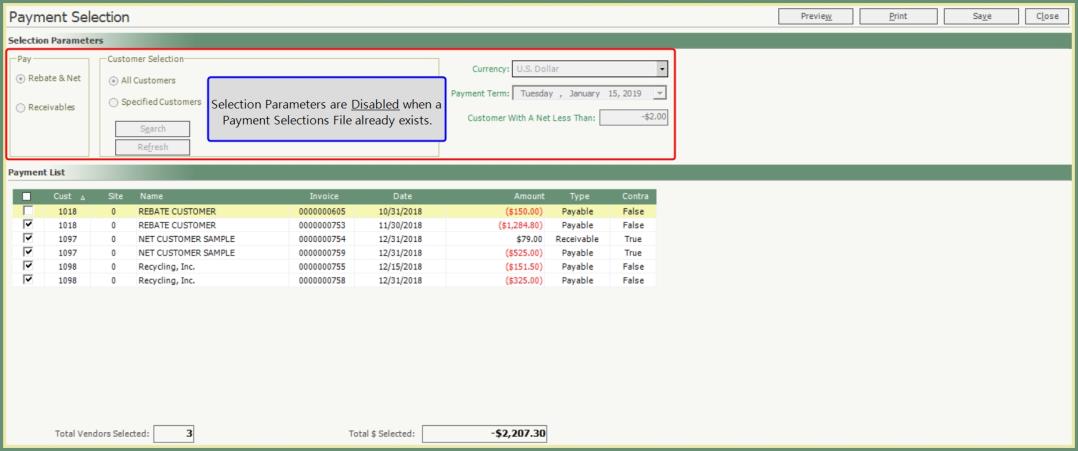
- Add or Remove invoice selections in the Payment List.
- To cancel modifications, click Close.
- Preview, Print or Save to save the modified invoice selections.
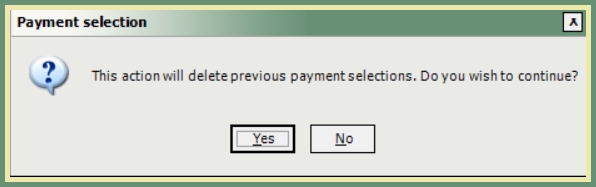
- Confirm the message, This action will delete previous payment selections. Do you wish to continue?
- Click Yes to replace the previous Payment Selections File.
- Click No to retain the existing Payment Selections File.
Delete Existing Selection of Invoices For Payment
An existing selection of invoices has already been saved when the selection parameters are disabled.


- Remove all invoice selections from the Payment List.
- Click the select/unselect all box in the column header once or twice until all invoices are unselected.
- Total Vendors and Total $ Selected are zero.
- Click Save.
- Confirm the message to delete previous payment selections.
- The invoice selections are deleted from the Payment Selections File.
- The Selection Parameters are now Enabled.